Pixel art / GUIDE
Pixel Art Shading: Light, Shadow and Pillow Shading
Give a small plum a clear light direction with three colors. Follow the drawing stages, then repair the dark rings that make the lighting ambiguous.
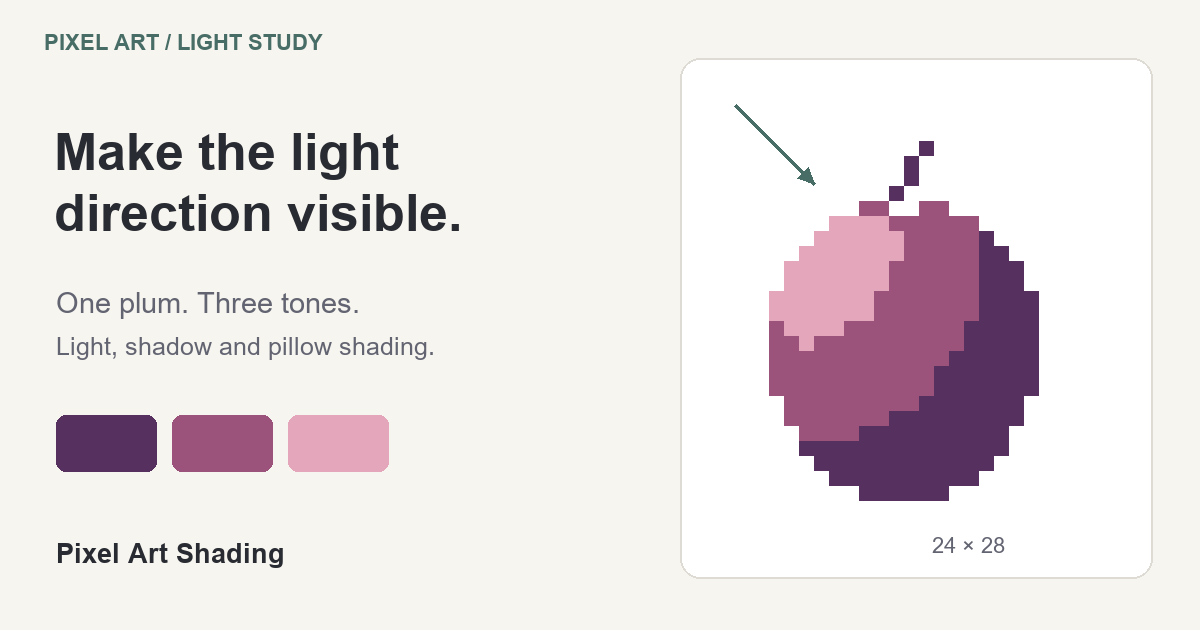
Put the light above and to the left of a plum. The pale area should favor that side, while most of the shadow gathers toward the lower right. This pixel art shading lesson builds that decision into one original drawing, then shows what changes when dark rings replace the directional shadow.
Choose a Light Direction
The plum occupies a 24 × 28 pixel canvas. Keep its silhouette fixed throughout the exercise: the outline describes the fruit's outer shape; the tones inside describe its rounded volume. Draw a temporary arrow outside the fruit, pointing down and right from the upper left. That arrow marks the light direction, not the direction in which to drag a shading brush.
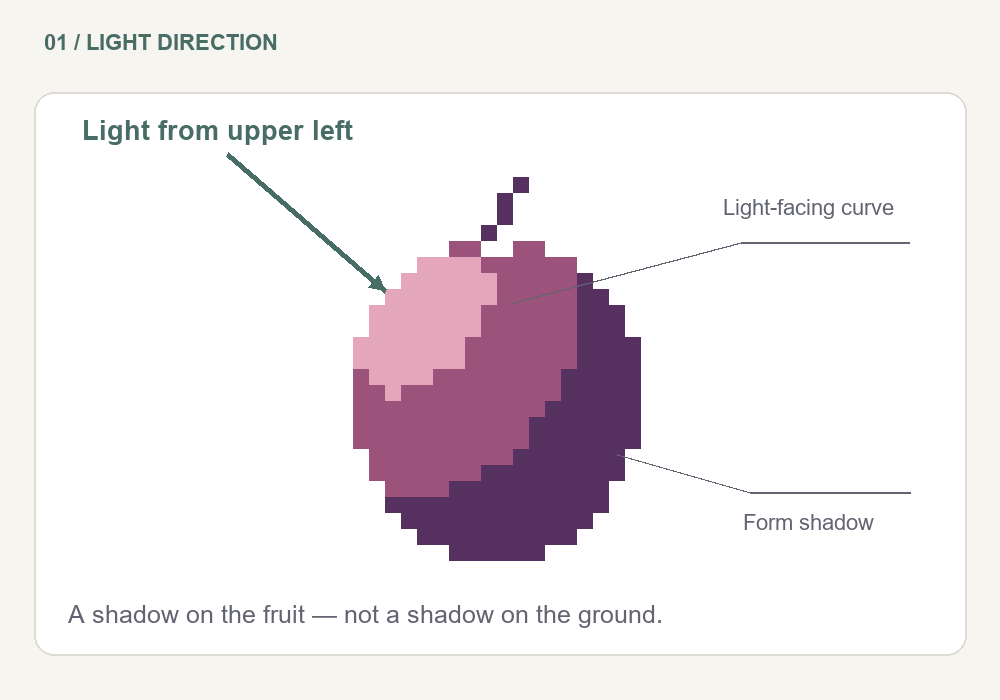
For this pixel art light source, let the upper-left curve receive the lightest color. Place the darkest area around the lower-right curve, where the surface turns away. The shadow's inner edge bends across the fruit rather than running as a straight diagonal stripe.
The dark region on the plum is a form shadow. A cast shadow would fall onto another surface, such as a table beneath it. No tabletop or cast shadow is included here, so you can concentrate on the fruit itself.
Light direction works together with shape. A rounded fruit and a flat box should not receive identical shaded bands. Livresquare's artist tutorial on shading also stresses considering both the object and its lighting instead of darkening borders automatically.
Build Shadows With a Small Palette
Use the following three colors for the fruit. Their roles matter more than copying these particular purple hues into every drawing:
- Midtone — #9B527B: the main purple fill, visible between the light and shadow.
- Shadow — #56305E: the dark side of the fruit. The tiny stem reuses this color.
- Light — #E4A6BA: the smaller pale area facing the light source.
The illustration background is separate from this three-color sprite palette. There is no extra black outline, white shine or intermediate blend in the plum.
How to shade pixel art with three colors
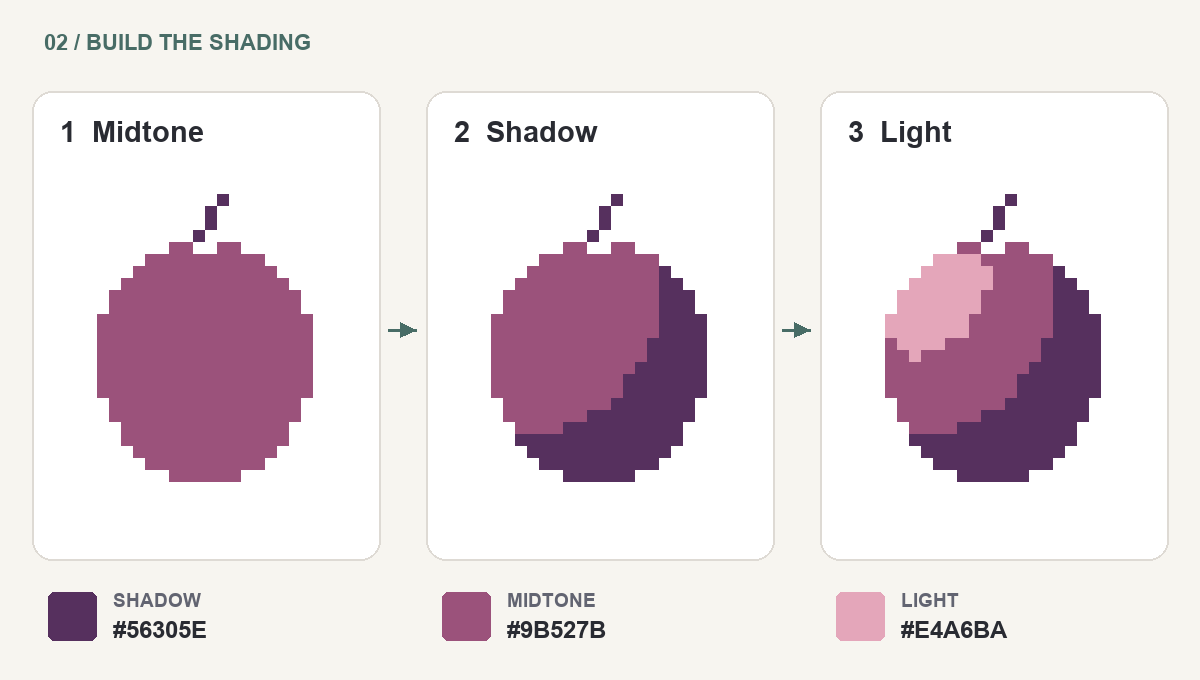
- Fill the fruit with the midtone. Finish the silhouette before judging its lighting. Leave the short stem dark so it stays distinct from the body.
- Paint the shadow as one connected area. Start on the right side and carry it around the bottom. Widen it toward the lower right; do not give the upper-left edge an equally thick dark border. The second drawing already suggests volume with just two tones on the fruit.
- Add a compact light patch. Replace part of the upper-left midtone with pale pink. In the finished drawing, that patch touches part of the upper-left contour without spreading across the middle of the fruit. Keep the broad middle area purple.
Use a hard-edged, fully opaque pencil for these edits. A soft brush would add blended colors and make this particular three-tone exercise harder to follow. Inspect the sprite at its intended display size after editing while zoomed in. If the light patch disappears, enlarge that cluster slightly before introducing another shade.
The sharp tone boundaries are intentional. For a separate treatment of textured transitions, see dithering in pixel art.
Pillow Shading vs Directional Shading
The left plum below was shaded inward from its outline: a dark outer band, a middle band, then a bright center. Its silhouette and three colors are identical to the right plum's, but it no longer communicates the upper-left light shown by the arrow.
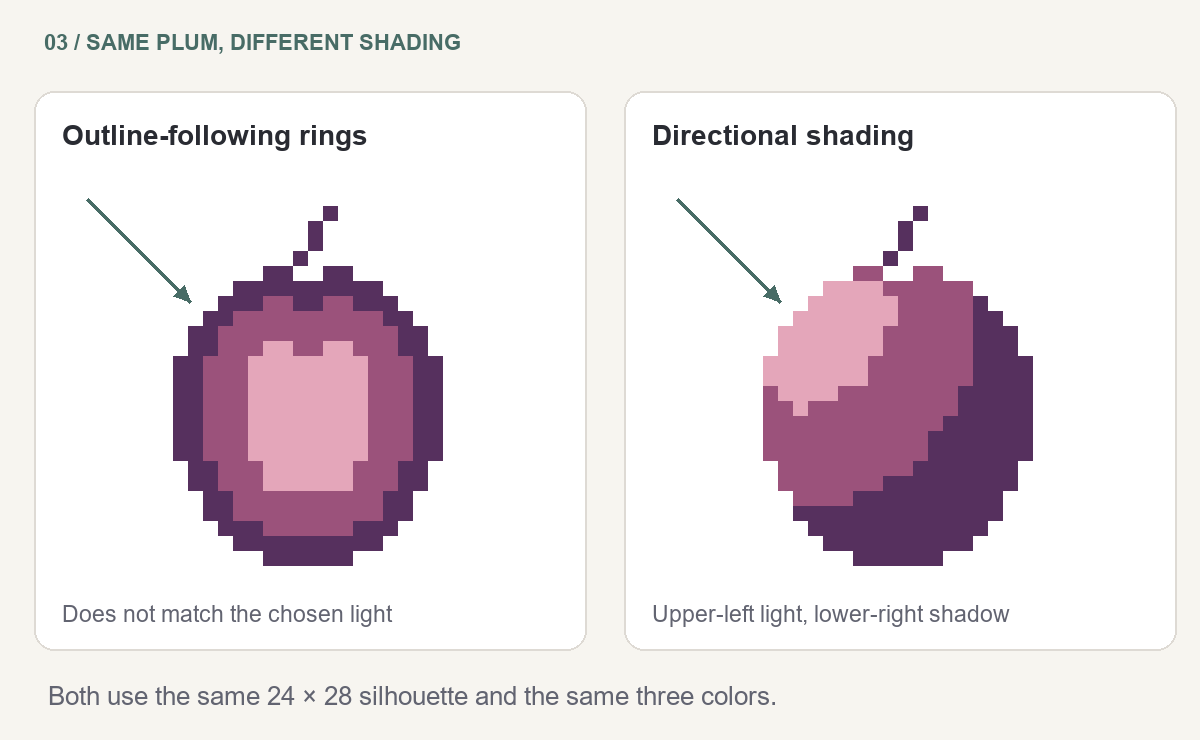
Pillow shading commonly describes this automatic contour-following treatment. A bright center alone is not proof of a mistake: a rounded object under frontal lighting can have one. The problem in this example is the mismatch between the chosen off-center light and the evenly dark border.
How to fix pixel art pillow shading
Keep the fruit's outline. First repaint the pale center with the midtone. Next, replace the dark band along the upper-left side with the midtone too. Reshape the remaining shadow into the lower-right crescent shown in stage two, then place the light patch on the opposite curve. This repairs the location of the existing tones without adding a fourth color.
For a final check, cover the arrow and look only at the fruit: its pale upper-left patch and darker lower-right side should still indicate the intended lighting. Then try a second version with the light coming from the upper right. Reposition both the light patch and the shadow; moving only the pale patch leaves conflicting clues.
A photo-based study has a different starting point. The image to pixel art converter can reduce an existing reference to a grid, but it does not relight the subject. Choose a reference with a visible light direction before comparing it with your own shading.